 |  |
| Home | Solutions/Products | Deployment/Installation | About Cryptography | User Manual | Tutorial | FAQ |
Working With Archives
It is a good idea to backup your important files in case of system crashes or other unexpected happens. With iSafeguard™ Archiver not only can you create normal ZIP archives you may also create archives that are secure. iSafeguard™ Archiver is a great tool for either backing up your sensitive data or sending it through the Internet without worrying about losing sensitive information. You can create three kinds of archive files:
A wizard is provided to help you create archives. Creating Pass Phrase Protected Self-extracting ArchiveA pass phrase protected self-extracting archive is useful when your recipients don't have iSafeguard™ installed on their computers. You recipients use the same pass phrase to extract the content of the archive as you do to create the archive. If you leave the pass phrase blank the archive will not encrypted, i.e. any one with a computer can run the exe file and extract the information. To create a self-extracting archive
Creating Signed and Encrypted ArchiveSigned and encrypted archive files are very useful to ensure privacy, integrity, non-repudiation, and authenticity of the archive. You may select to sign, or encrypt, or sign and then encrypt the archive based on your needs. Your recipients must have iSafeguard™ installed on their machines to be able to extract the archive. To create a signed and/or encrypted archive
Creating ZIP ArchiveZIP archive files are useful if your recipients have iSafeguard™ or a ZIP utility program installed on their machines and you don't care or worry about being intercepted or modified by others during transmission. This type of archive is a normal ZIP archive that can be opened with any software that supports the ZIP file format, including iSafeguard™ Security Suite. To create a ZIP archive
Email Your Archive FileIf you want to attach a newly created archive file to an email make sure you check the Email archive file when done check box on the "Ready to Archive" page of iSafeguard™ Archiver. When you click the Finish button after successfully created the archive file the software will launch an email composition window and attach your archive to the email. Extracting Self-extracting Archive FilesTo extract a self-extracting archive file
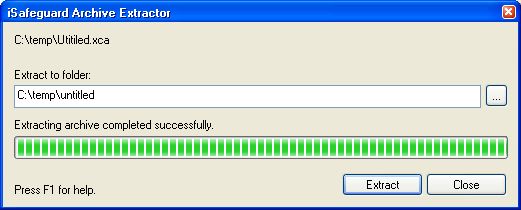
Extracting Signed and/or Encrypted ArchiveThe GUI to extract this type of archive is the same as extracting self-extracting archive file. However you must have logged in before you can extract the archive because decrypting, verifying signature needs to access your private key and other people's certificates. The software will prompt you to login if you are not currently logged in. To extract a self-extracting archive file
Extracting ZIP Archive FileTo extract a self-extracting archive file
|
| Trademarks | Copyright ?2001-2007 MXC Software. All rights reserved. |
 Note: This feature is not available in
freeware version.